
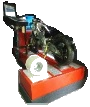
I have my Dyno for a couple of years now, and really enjoy working with it.
Its a small concept but for testing my 125's and 250's it works great, testing up to a 60-70HP is more then enough for me.
But the bearings need replacement, so way not make a small update while you are replacing them.
Its a small concept but for testing my 125's and 250's it works great, testing up to a 60-70HP is more then enough for me.
But the bearings need replacement, so way not make a small update while you are replacing them.
Here a picture off the 285KG flywheel.
Good for testing up to a 60-70HP
Good for testing up to a 60-70HP
The Bearing and holder at the Left side.
All is coming from Carting parts
All is coming from Carting parts
Right side holder and bearing
Also visible is the pickup for the Flywheel rpm
Also visible is the pickup for the Flywheel rpm
Left side brake
Right side brake
Hydraulic pomp for braking the flywheel.
Controlled by a lever at the frond
Controlled by a lever at the frond
Using a external house weather station.
At the beginning off the dyno runs I just type manually the values
At the beginning off the dyno runs I just type manually the values
What I like to upgrade my dyno with, ar simple ones and more difficult ones.
The simple are a USB weather station so the software is always using the correct values and lambda measuring unit so I can see how the fueling is.
The Difficult one is I like to brake the flywheel so I can measure under load, this is the one witch is mind blowing as its exceeds the cost of a simple dyno for the hobby enthusiast.
Because the software is from sport devices, logical is to use the weather station that works with it
So this one is on my list
So this one is on my list
The same company sells the Lambda sensor kit
So also this one is on my list
So also this one is on my list
The mind blowing ones are how to brake the flywheel
Most perfect solution would be the Eddy current brake
But a complete controllable set is around 6500-7000Euro
That exceeds my budget for a hobbyist
Most perfect solution would be the Eddy current brake
But a complete controllable set is around 6500-7000Euro
That exceeds my budget for a hobbyist
Something more affordable is a magnetic powder brake.
These are from 10Nm till 800Nm so that is a option.
I don't need to measure with it, just need to give the flywheel some load.
So I can hold it in second or third gear to see how the fueling is
These are from 10Nm till 800Nm so that is a option.
I don't need to measure with it, just need to give the flywheel some load.
So I can hold it in second or third gear to see how the fueling is
Currently working out how the make this all constructive.
As the communication and help from the original dyno builder ROTEG is great so I like to build/upgrade my dyno in the way they could build it.
It is a lot off work, but like to have it working before the summer as there I'm testing the most.
As the communication and help from the original dyno builder ROTEG is great so I like to build/upgrade my dyno in the way they could build it.
It is a lot off work, but like to have it working before the summer as there I'm testing the most.
Hope to update soon...
First part off the order arrived
-bearings
-whether station
-Lambda station
-Silent blocks
-Adapters
-bearings
-whether station
-Lambda station
-Silent blocks
-Adapters
-etc ect
Update: 30-04-2018
Don't mind the mess, it needs to get worse before it gets better
Today started with updating my dyno, one part of this upgrade needs to wait because it takes to much work to get it done within a couple off days.
It will have to wait until next year...
Today started with updating my dyno, one part of this upgrade needs to wait because it takes to much work to get it done within a couple off days.
It will have to wait until next year...
Planning the next:
-Replacing the bearings
-Mount the starter kit
-construct a wider mid section. (so my feet can rest somewhere)
-Construct a devise for exhaustgas removal
-Lambda unit working
-Some small changing at the back (wood work)
Two big stands will push up the drum
There we go
Complete lifted up, time to replace the bearings
New bearings
New bearings and starter plate
Packet is going down
Brakes and starter plate
A nice big starter
Update 01-05-2018
Sadly I forgot to take more picture will constructing, but the idea is simple.
I need to enlarge the space on top so I can rest my feeds on it will doing a dyno run.
So made a removable top plate.
I need to enlarge the space on top so I can rest my feeds on it will doing a dyno run.
So made a removable top plate.
The metal plates tacked together
Finished it with Durbar floor plate's
Update: 02-05-2018
Sadly today didn't goes as planed, got one thing working and that is the electric starter.
Hope to do more tomorrow.
Hope to do more tomorrow.
Have added a electric starter on the drum for the more classic bike's
It works great.
It works great.
Update: 03-05-2018
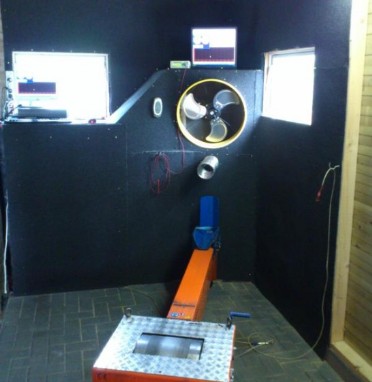
Today I changed the engine cooling, as my flex pipe wasn't that great.
You can position the bents in any position so is easy for the use of a other bike
You can position the bents in any position so is easy for the use of a other bike
A bid twisted on the picture, but you can mount them in any position
Easy to aim
Here seen with the complete bike